Showing posts with label Crafts/Projects. Show all posts

Saturday, July 3, 2010

Flag Decor


I so wish I had time to make this today! It is so cute and would look so good with my table decor for tomorrow. I'm so impressed Jamara. you are so crafty.

Oh well, there is always next year.

"I'm bored!"

If you have kids like mine, by now all you are hearing is: I'm Bored! There's nothing to do..."
So, i thought i'd try out a list. (i'm a list freak. i make lists for everything)


I made it very simple. that way they could decorate it if they wanted to. (of course they didn't want to)
Then i laminated it so they can check off with a dry erase marker what they've done so far.
Then, everytime they are bored, they can look at their list and see something that they wanted to do this summer, and do it!
I'm not sure if it's going to work or not, but for now, it's keeping them occupied!

Friday, July 2, 2010

In My Next 30 Years

When i Turned 30 (wait, what? i'm still 29!) I had a bit of nastalgia. Looking back seeing what i've accomplished in my life... and what i want to accomplish in my next 30 years.
A friend of mine is turning 30 so i made this little book for her.


On the inside i copied the words to the song "in my next 30 years"
Then just left blank paper.
This is where she can write her "bucket list" all the goals that she wants to accomplish. all the things she wants to do and see.


If someone only made me one of those... i might of done something more exciting with my life... well, probably not...

Silverware caddy

I've always wanted a silverware caddy. You know, one of those things you use to put silverware in when you are having a BBQ or outdoor party. or a get together...
well, I have enough parties to justify the cost of one, but i just can't find the right one.
Well, for the 4th of July i'm having a get together with my family, and i needed something for the silverware... not to mention something patriotic for the table. so, this is what i came up with.


I used Mason jars that i have for my canning. I had some scraps of red ribbon, an old pair of jeans, and some burlap left over....
Not bad for a free silverware caddy!!!

Wednesday, June 23, 2010

Father's Day Present

This is my version of this Father's Day present.
I showed that site to Christina, my bro's girlfriend, and we decided to do it our own way.

I actually wanted a round one. (like a small hat box) but i couldn't find one anywhere. (there isn't a craft store around me...) But this one worked fine.


We used sand paper to rough up the outside. Then i modge podged the paper around the container. Christina and I used my cricut to make the letters. One side says Nuts. and the other side says Shells. (this is the part that would've looked better had the container been round.) Then I modge podged over top of it all.

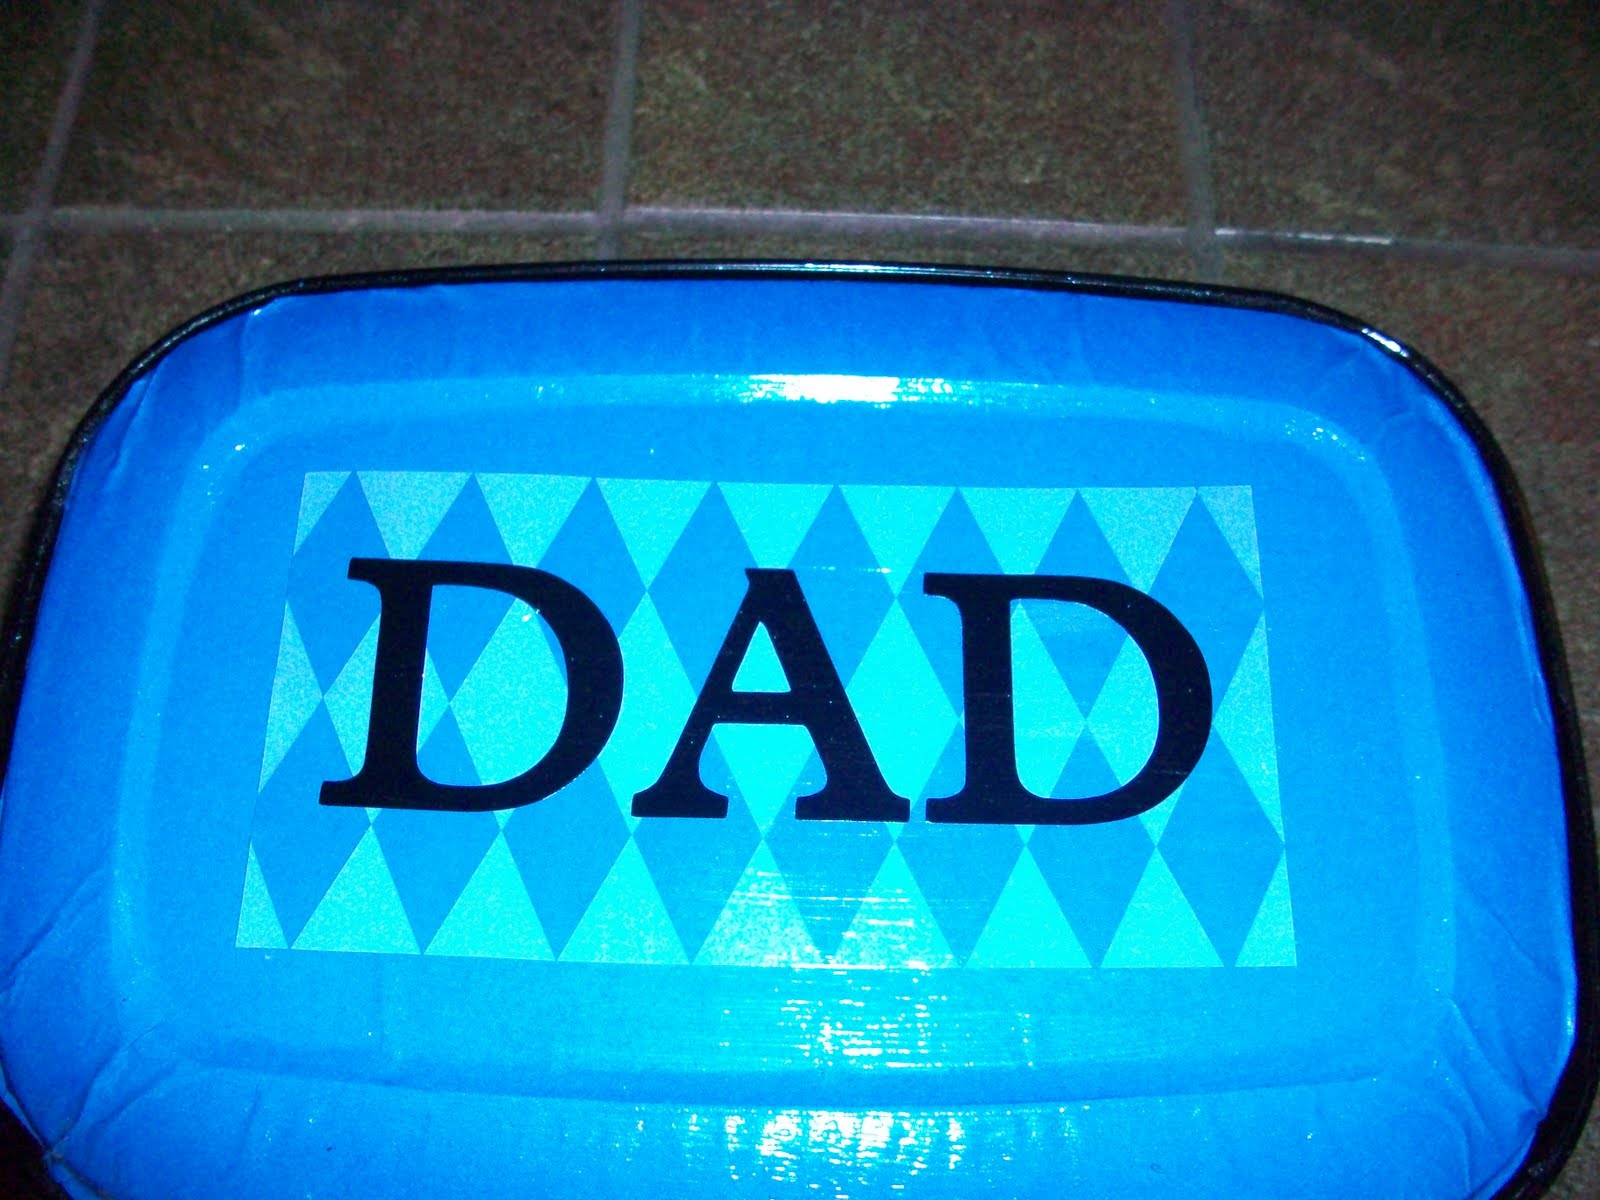


For the lid I used sand paper, then actually spray painted it first before adding the paper. That way the edges would match instead of the green it was.


On the inside i just cut some cardboard to make the separation. Then i modge podged the matching paper on it for good measure...
I just used glue dots to secure it down and keep it in place. That' was totally Christina's idea and it worked great!


it didn't turn out like i wanted, but it works for the purpose it holds...


Good thing my dad isn't too picky!


Friday, June 4, 2010

coasters

So, I made some coasters. I realized i needed some when i saw rings in the wood of my nightstands. All the humidity in the air makes the cups sweat, which makes a circle in my wood... Hence the reason i needed some coasters. I'm too cheap to buy any. So... this is what i did...


I had a few old tiles from Lowes. They were about 10 cents a piece. I hot glued some felt circles on the back. I had some left over from when we got hardwood floors and I had to put it on all our furniture...if you don't have these, you could always make your own felt pads with some material scraps.


I used some material scraps and traced the tile.


Then I mod podged the tile. Laid the material down, waited for it to dry a little then mod podged over the top. I actually did several coats on the top.


They turned out really well. They work great. and it didn't cost me hardly anything to do. you could take it a step further and make your coasters match your bed covers or curtains... but, like i said ... i'm too cheap and just used whatever scraps i had. I'm sure you could also do some embellishments too, but i'm going with the simple, user friendly coasters. besides. i have to talk the boys in my house into using them. do you think i'd be able to do that if the coasters were covered in bows and flowers??? LOL


chalkboard tags update


What do you think now that it has the chalk on it. I personal love it!

I'm thinking about doing some decorating in the kitchen... maybe i'll use this as my inspiration.

Now if i could only get the chives to grow! lol

Friday, May 21, 2010

chalkboard tags

My boys got me a "grow herbs yourself" kit for mothers day. (even though they grow out in the garden... i thought it was a fabulous gift.)
Well, they helped me plant the seeds and water them. And they have sprouted. I thought they looked so cute sprouted in their clay pots. But, then I see the little tag in the dirt that says what they are.... and thought it was such an eye sore.
So, i thought, " oh how cute it would be if i wrote on the pots with chalk what it is... that way i can erase it when its done and replant something else in it..."
Then, i took it one step further and thought i could actually use my chalkboard paint and make alittle square on the clay pot itself and write on that! how adorable!!!
So, i had a plan and they were going to be so cute!

I made it way too hard on myself. I'm too cheap to buy what i really need for a project, so i improvise and make it harder then it has to be... Maybe thats why i always say that i'm not a crafty person. lol
Well, the chalkboard paint i happen to already have was in a spray can. so instead of getting a bottle of stuff i could paint with a brush... i taped off a square area on each of the pots and sprayed away.

DISASTER!

the tape wouldn't really stick cause the clay pots were so damp. so, the paint got underneath some of the tape where it was coming off... Then, the spray got all over everywhere. not just the square, or the tape around the square... but, the table i was doing it on. the other pots that i wasn't currently painting, all over my hubby's hands ( he was trying to help by covering the actual plants so they wouldn't get sprayed and die)

Needless to say this project was a lot more difficult then it should've been had I had just gone to the store and got a bottle of the paint i could use a brush with...

Oh well... now i know...
and they didn't turn out too too bad. as long as you don't look close.
hopefully now i can print really cute on there the names of the herbs. I'll take a pic after i've labeled them and update this post....


Tuesday, May 18, 2010

Spring Summer Blocks


Okay, so I got my Cricut! It's a Cricut Expressions. I need to play with it more to see what it can really do... but, I'm getting pretty good at cutting out letters for our vinyl signs. LOL
I wanted to post pictures for the final project on my blocks. Instead of just doing Spring blocks, I decided to utilize the back side of the blocks to and make a summer one. So one side says Spring and is in spring colors, the other side says Summer and is in summer colors...
If i were to do it over again. i would have used coordinating paper on both sides. That way my embellishments could hang over the sides and tops and not clash with the other side....
I'm pretty happy with the way they turned out though.
They were super easy.

step 1: cut the wood blocks to different sizes (you can really use any scrap wood you have. I think mine is about 1inch thick. but they are all different widths, cause i used scraps)

step 2: sand down the blocks

step 3: stain the wood blocks. (my mom did some and she painted the blocks a antique white instead and it looked good that way too!)

step 4: trace the block sizes on the the paper.

step 5: Cut out the letters in coordinating colors to the paper you chose.

step 6: MODGE PODGE. I modge podged the paper on. then when it was dry I did a top coat, and laid the letters down. When it was dry I did a coat over the whole thing.

step 7: Embellish!

See - easy peasy!
Good project for those who want simple decor that can be used for numerous seasons.


Monday, December 14, 2009

Writing in December about December...

Amazing... lol
I'm really going to make it my goal for next year to update the blog more....
I can't believe it's 12 days before Christmas. Not one christmas cookie has been made, not a single christmas card has been sent out...not any lights on our house... presents??? yeah right...

Unfortunately our family has been pretty sick the past couple of weeks. My kids are lucky to have gotten dinner... let alone christmas crafts, cookies, lights or presents...

i just have not had any energy to do anything. Being pregnant i can't take a whole lot for this "virus" that has taken hold of our house. I can't sleep at night cause i stay up coughing... My poor hubby keeps sleeping in the guest room so he doesn't have to hear me all night.

My kids are fed... balanced meals? if you can consider frozen pizza and chicken nuggets a square meal, then yes.... They have clean clothes. not folded or put away, but they are able to go through the mountain of clean clothes to find something to put on. Sean and i have been able to attend their christmas programs and lunches at school. Did i look cute? no. Did i talk to any other parent? no... but, i was there... and we were able to support our children.

Alas, we are starting to feel a little better. Hopefully i can wade through the dr appointments and cleaning this week to have time to make a few crafty projects and treats for christmas.

I did however get one thing done before the sickness came... Mostly cause it was done in Nov. at a Relief Society craft night...
I thought it was worth mentioning though. i thought they were kind of cute.


very simple nativity. well... Mary, Joseph, and baby Jesus anyway...
again... kid friendly!
Hopefully, i will be able to update later this week with the good news of how organized my house and family are for the holidays! LOL
or at the very least... we are surviving and feeling better...

Thanksgiving


So, its December 14th, and i'm just know writing about Thanksgiving. How horrible is that. can you tell that updating my blog has been on my list of stuff to do for a while now? Maybe my New Years Resolution can be updating my blog weekly?!?!?

We've had a great holiday season so far. Before i start writing about Christmas and the things we have been doing ... i want to share a few pics of some crafty projects i did this fall. This first one i actually made last year... but since its the only fall decor i have, i figured i'd share it.


Cute pumpkins huh. Its just fall fabric... stuffed, then some leaves and raffia at the top. Oh and a a stick for the stem. Super easy, and kid friendly.

i'm one of those people that need to have something hanging on my front door. And i didn't have anything for Fall or Thanksgiving... so off to the craft store i went. I actually was just looking for a sign... but couldn't find one that i really liked. so, a craft project began.


i got the letters on sale for .50 cents. and the background board was on clearance. i got it for $2.00. I just modge podged some fall paper on the letters. Inked and sanded the edges... then glued it to the back board which i stained a dark brown. Added a little raffia... and called it good. not bad for $4.00 bucks huh?


I wanted to make one more project.
I just didn't have the time to do it before Thanksgiving was over.


isn't it cute?? it's the only wreath i've seen that i actually like. I found this project here
Cute blog called Inspiring Creations. She does a great job! Guess this is going on my list for next year!


Tuesday, November 17, 2009

Baby Shower

My sister, Stephanie, threw me a baby shower this past weekend. I'm only 7 months pregnant. So, this was a little early. But, we wanted to do it before everyone got busy with the holidays. And that way whatever i didn't get at the shower, i could ask Santa for. :)
The shower turned out really well. Mom and Steph did a great job with it! We had a boy onesie theme. The invites were adorable. Instead of playing all the stupid baby shower games, we decorated onesies and ate. it was a lot of fun. here are some of the pics i took of all the decor.
This is them decorating the onesie cookies. they made blue and brown frosting that matched the colors of the party. she even got the little round balls to look like that snaps on the bottom of the onesie. i wish i had some close ups of it. super cute!


She took the time to make fry boxes as the thank you gift. She stamped thank you on all of them and put a little onesie decal on the front. Then she filled them with Hershey kisses. she even got the cookies and cream ones that had the silver and blue wrappers. I don't know how long it took her to make these, but WOW!


This was the table scape. I absolutely love it. We made the tissue paper balls from the pattern on martha stewart's blog. They turned out really cute. I took some close ups of the different things at the table so you could get a better idea of how detailed she is.


Water bottles with personalized labels. I loved this idea. Its says baby. and it has the same onesie decal on it! too cute!


this is a fruit dip that i made. it so easy to make but it's totally to die for! of course the only nutritional part of the whole thing is the fruit that you dip into it. lol
i'll have to post the recipe soon.


i also made angel food cake to go with the fruit dip. it's incredible!

Look at these meatballs! The individual tooth picks all have the onesie decal on it. Stephanie is so smart. they look fabulous!
This was my favorite part of the food. different cheeses on a platter. i'm not a huge cheese connoisseur, but i love to try different types. i actually went with all mild cheese. And nothing too outrageous. It was a lot of fun. I got some great pics of some of the ladies trying the different cheeses, and the looks on their faces. i think they may stick with cheddar. lol
even here she had the little tags with the kind of cheese. way to pull it all together steph.
Mom and Steph (well, actually i think it was dad) set up a crib to put the gifts in. I thought that was a great idea. way better then just a table. super cute idea. made it look more festive. and part of the decorations. Love it!
They strung a clothes line across the whole room with the onesies. They started the nite plain. but as everyone decorated them, they hung them back up looking even cuter. i wish i had some pics of the finished product. but, you'll have to take my word for it. way cute. We had just found different clipart online, and made up some sayings to go with them, then just printed it out on transfer paper. We ironed them on the onesies. We had a few decals that Steph had gotten at Hobby Lobby. And she had also picked up some fabric markers. Way fun, and much better then all the boring Baby shower games! (no offense to anyone out there!)
Overall, the party turned out great. i hope everyone had a good time. I did anyway. it was nice to just socialize with everyone, and Steph and mom did a fabulous job with the planning and decorating. It was the baby shower of the century!
Thank you.

Wednesday, November 4, 2009

Happy Halloween

We had a Halloween party at my mom and dad's house this year. we invited a few families from the ward over. It turned out well. we expected to get rained out, but mom's prayers were answered and it ended up being a perfect evening for an outdoor party.
Stephanie and i had a good time making some signs for the decorations.


The boys looked so cute in their costumes. They wouldn't tell anyone what they were going to be so that grandma and grandpa would be surprised and say "who are those boys? i don't recognize them". They even said during their prayers the week before, "Please bless that grandma and grandpa will be surprised by our costumes, and maybe even be scared" Ahhh the innocence of children"


I even talked Sean into dressing up for the party. We both got hair cuts just for our costumes. I even dyed my hair for it.

If you've ever seen NCIS... you should recognize my costume. Abby is my favorite character. i wish i had gotten some better pics of it. i had the mini skirt, the striped tights and the combat boots to match. Sean... can you guess what he is??? i'll give you a clue... " I pitty the fool, I pitty the fool"

That's right... a white Mr. T

He looked great. Mohawk and all... though you can't tell from the picture...


I did have to steal his overalls after the party and wear them... can i just tell you how comfy overalls are when you are pregnant...